

What if a controller that looks like the right fit still isn’t compatible with your e-bike? A replacement procedure can apply to some models but not others, so identifying your exact bike is the first step.
It’s easy to focus on a controller’s shape, but model compatibility and wiring matter too. Before removing anything, identify your bike and prepare the tools required for the job. Then disconnect the wiring carefully, remove the old controller and install a suitable replacement according to the instructions for your model.
This guide covers fit checks and the replacement process, including tools to prepare and details to watch when reconnecting cables. Don’t assume instructions for one model apply to another. Checking compatibility first can help you avoid forcing connectors or trying to mount a controller that doesn’t match your e-bike.
Key Takeaways
- Confirm your RadRunner model before choosing a controller: the replacement procedure applies to Runner 1 and Runner 2, but Runner 3 Plus has separate instructions.
- Gather the model-appropriate Allen wrenches and other tools before you start, so you can remove covers and mounting bolts without improvising.
- Disconnect the wiring connectors carefully and note their routing to help guide reconnection and controller fit.
- Follow the correct removal and mounting sequence, and use the specified tightening details for your model.
- For help with e-bike parts or maintenance in the Edmonton area, Sherwood E-Bikes Ltd. offers both as part of its e-bike support.
Sherwood E-Bikes
Sherwood E-Bikes can help with e-bike parts and maintenance when you need support with a controller question. A replacement isn’t simply a matter of finding a unit that looks similar. The bike’s model, wiring, connectors, mounting arrangement and electrical system all affect whether a part is suitable. If you’re unsure how these details fit together, E-Bike Parts and E-Bike Maintenance are relevant places to start.
The work you’ve already done to identify the bike and understand the replacement process can make a conversation more productive. Bring the model name and year, if available, along with details about the controller and the issue you’re addressing. This helps clarify whether you need a compatible part, want to understand a maintenance concern, or are deciding whether to continue a do-it-yourself repair. The answer shapes the next step.
When a parts question needs more than a visual match
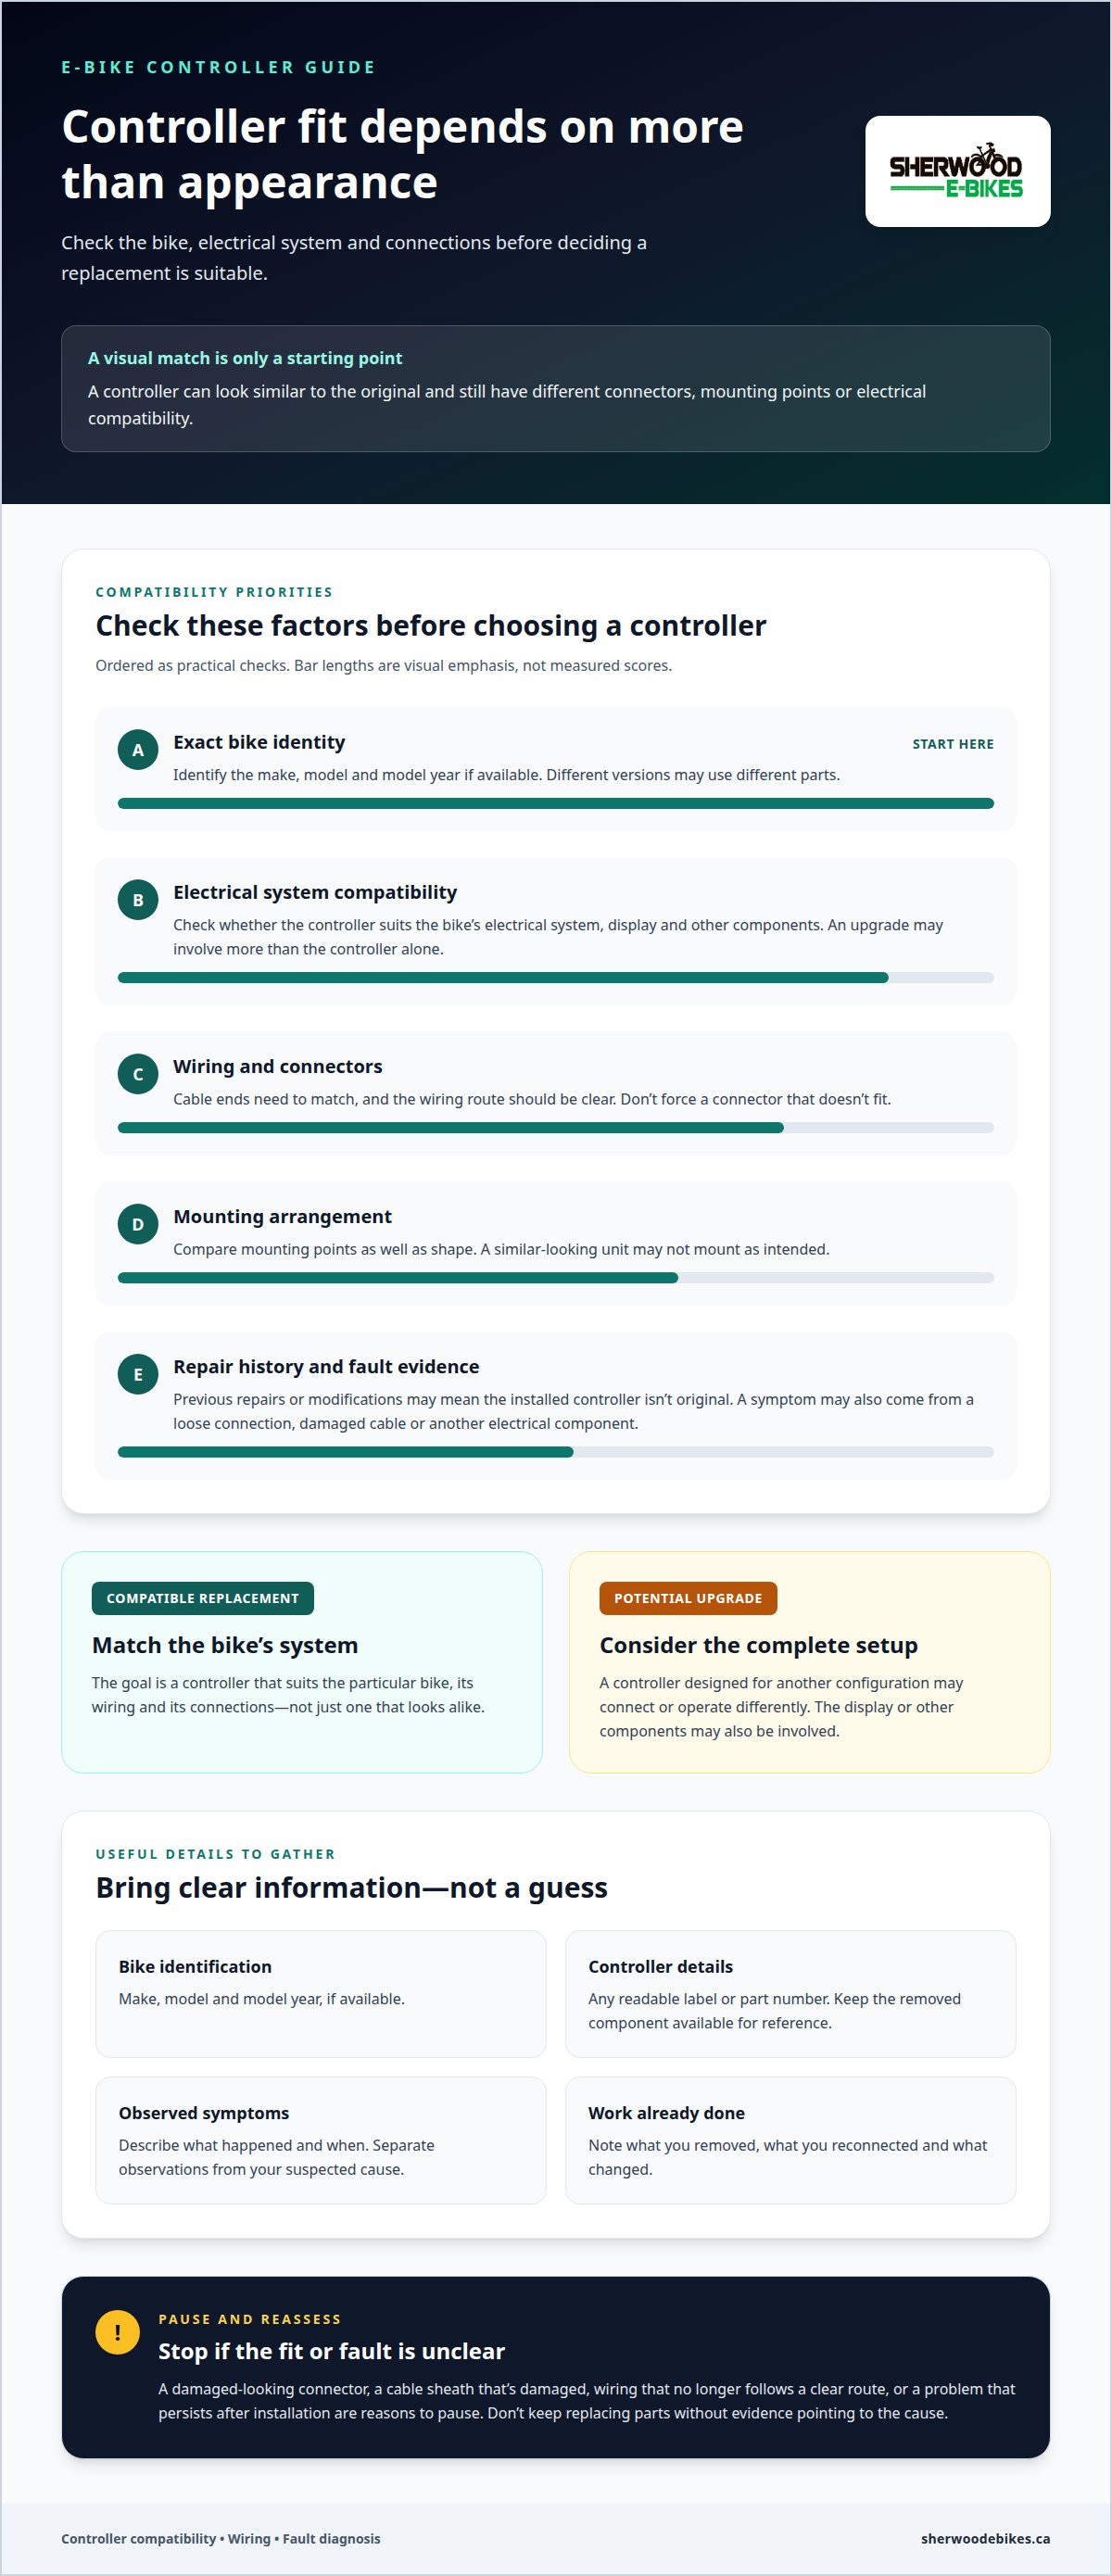
A controller can look much like the original and still differ in important ways. Cable ends may not match, mounting points may sit differently, and the connections may be designed for another bike version. Electrical ratings and compatibility with the display and other components matter too. Appearance alone doesn’t prove compatibility, and a similar-looking part may not install as intended.
E-Bike Parts matter here because the goal isn’t simply to locate a component. It’s to identify the part that suits the particular bike. If you’re considering a replacement, identify the bike as precisely as possible and describe the controller you’re replacing. A model label, parts identifier or clear picture may help explain what you’re looking at, but the part still needs to match the bike’s system. Don’t assume parts for different versions are interchangeable.
Keep the difference between a compatible replacement and an upgrade in mind. A controller designed for another configuration may have different connections or operating characteristics, even if it can be mounted. An upgrade may involve the display or other components, not just the controller. Considering the complete system helps prevent a parts decision from creating a wider compatibility problem.
This matters especially if the bike has had previous repairs or modifications. The installed controller may not be the original, so its appearance alone may not identify what the bike was built to use. The bike’s model details and electrical connections provide important context. If you don’t know whether the installed controller is original or a later replacement, don’t rely on it as your only reference.
A parts question can also point to a broader maintenance issue. A controller is one part of an electrical system, and a symptom that seems to implicate it may have another cause. A loose connection, damaged cable or separate electrical component can affect how the bike behaves. That doesn’t mean you should replace other parts without evidence. Base the replacement decision on a clear understanding of the fault, not a hunch.
When maintenance support can help
DIY work may suit you if you have the right tools, understand the procedure and can handle the bike’s wiring carefully. Consider E-Bike Maintenance if the fit remains unclear, a connector looks damaged, the wiring route is difficult to follow, or the bike still has the same problem after installation. These are practical reasons to pause and reassess, not to force a part into place or keep replacing components without a clear diagnosis.
Maintenance support is relevant when the repair involves more than removing and mounting a controller. Electrical faults can be difficult to isolate because one symptom may have several possible causes. A bike that powers on inconsistently, behaves differently under load or displays an error may need attention beyond the visible controller. Ask not only, “Which part should I replace?” but also, “What evidence points to that part?” A sound repair decision connects the symptom with the system component responsible.
If you’re comfortable with basic bike work but less familiar with electrical connections, separate tasks by complexity. Mechanical access and careful cable handling are different from diagnosing an electrical fault. If a connector has been forced, a cable sheath is damaged or the wiring no longer follows a clear route, stop and reassess. Continuing without understanding the problem can make it harder to identify the original cause.
Sherwood E-Bikes provides e-bike maintenance support when a controller question is part of a wider service concern. Maintenance considers the bike’s condition and the work it may need, rather than treating every electrical symptom as a simple parts swap. If you’ve started the repair, explain what you removed, what you reconnected and what changed. That gives a clearer picture of the repair stage and the issue you’re trying to resolve.
There’s no need to turn a straightforward job into a complicated project. Make a sound decision based on the bike in front of you. If the controller matches and the installation is clear, the repair may remain manageable as a DIY job. If compatibility is uncertain or the symptom persists, maintenance support can help you decide on a sensible next step. Pausing to reassess is more useful than replacing another component at random.
What to have ready for a useful discussion
Before discussing a parts or maintenance question, gather the information you already have. You don’t need to diagnose the fault yourself. A concise description of the bike and the problem can make the conversation clearer.
- Bike identification: Note the make, model and model year if available. Different versions can use different parts, so precise identification is more useful than a general description.
- Controller details: Record any label or part number that can be read without dismantling the bike further. If the component has already been removed, keep it available for reference.
- What happened: Describe the symptoms in plain language and when they occur. Separate what you observed from what you suspect the cause might be.
- Work already completed: Mention which covers or components were removed and whether any connections were disconnected or replaced.
- Visible concerns: Point out any connector that appears damaged, a cable that looks pinched, or a mounting issue that prevented the part from sitting correctly.
These notes frame the conversation without turning it into a home diagnosis. For example, “the bike loses assistance after the controller was changed” is more useful than “the new controller is faulty” if the cause hasn’t been established. A clear account of what you observed leaves room to distinguish a compatibility question from an installation issue or another system fault.
Photos can help describe a visible part or connection, especially if you’re unsure what a component is called. Take them only if you can do so safely, without pulling on wiring or opening parts you’re not comfortable handling. A clear view of a label, connector or mounting location may provide context, but it doesn’t confirm that a part suits the bike’s configuration.
If you still have the original controller, keep it with your repair notes. Comparing the old and replacement parts may reveal obvious differences in connectors, mounting tabs and cable length, but it can’t establish electrical compatibility on its own. Treat the comparison as useful context, not proof that the controllers are interchangeable.
It also helps to state your goal. You may want a replacement part, help understanding a maintenance issue, or guidance on whether to continue a repair you’ve started. Naming your goal keeps the discussion focused. For a parts question, describe the bike and component. For an unresolved fault, describe the bike’s behaviour and the work already done. If you’re unsure which direction to take, say so rather than choosing a part before understanding the problem.
Parts, maintenance and accessories in context
E-Bike Parts and E-Bike Maintenance address different but connected needs. Parts relate to the component you may need; maintenance concerns the bike’s condition and the work required to keep it functioning. They can overlap when a replacement part is part of a repair. Keeping the distinction in mind helps you avoid treating every repair question as a shopping decision, or every parts question as a reason to replace an entire system.
Cycling Accessories are another part of the e-bike support available through Sherwood E-Bikes, but they don’t replace a controller compatibility check. An accessory can support your riding setup, while a controller is part of the bike’s electrical system. If your immediate concern is a controller that doesn’t fit, focus first on the component and bike configuration. Accessories may suit other practical needs, but they don’t determine whether the controller is compatible.
Commuter E-Bikes serve a different purpose. They’re relevant if you’re considering an e-bike for everyday travel, rather than repairing the controller on your current bike. Keep these needs separate to make the next decision clearer: a maintenance question concerns your current bike, a parts question concerns component compatibility, and a new-bike decision concerns how you plan to ride. Sherwood E-Bikes offers support for these distinct needs.
For a controller issue, start with the current bike and the information you can identify. This keeps the discussion grounded in its model, system and condition. A similar-looking part, a symptom resembling another fault or advice for a different version shouldn’t replace a fit assessment. The next step depends on whether the challenge is identifying a part, installing it or diagnosing the fault.
Keep your repair notes after the immediate issue is addressed. Knowing which part was installed and what work was completed can provide useful context for future maintenance. Keep the removed component or its identifying details, if available, and note any changes in the bike’s behaviour after the work. Clear records make future parts and maintenance questions easier to describe accurately.
If you’re unsure whether to continue on your own, identify what’s stopping you. A connector that doesn’t match the bike points to a fit question. A controller that mounts but leaves the original symptom unchanged points to a diagnosis question. Disturbed or damaged-looking wiring raises a maintenance concern. Describing the specific obstacle provides a practical starting point and helps avoid an unnecessary leap to another part.
The goal is a repair path that suits your bike, not a rushed purchase or a complicated process. Identify the bike clearly, explain what you’ve observed, and distinguish the part you’re considering from the fault you’re trying to solve. Sherwood E-Bikes’ E-Bike Parts and E-Bike Maintenance services can help with those decisions. Contact Sherwood E-Bikes to discuss your e-bike parts or maintenance question.
Choose the Right Next Step for Your E-Bike
Regular maintenance can help keep your e-bike ready for the way you ride. If you have questions about your current setup or future commuting needs, treat those as separate decisions and address the immediate maintenance concern first.
Sherwood E-Bikes Ltd. offers E-Bike Parts, E-Bike Maintenance and Commuter E-Bikes. Keep a note of the issue and any work completed so you can refer to it when discussing parts or maintenance with Sherwood E-Bikes Ltd.
Move forward one decision at a time. A clear maintenance plan can help you focus on the rides ahead.
Frequently Asked Questions
Where can I buy a replacement controller for an e-bike in Edmonton, Alberta?
Sherwood E-Bikes offers E-Bike Parts for riders in Edmonton and nearby communities. A controller needs to match the bike’s model and electrical system, not just resemble the original. Have the bike’s model details and any identifying information from the old controller ready. If you also need help with the repair, Sherwood E-Bikes provides E-Bike Maintenance.
What tools and steps are needed to replace an e-bike controller safely?
Use the tools specified for your exact bike model and follow its replacement procedure in order. The procedure described here calls for a 3 mm Allen wrench for the four skid plate bolts, a 4 mm Allen wrench for skid plate mounting bolts, and an 8 mm wrench for the rear locknut. Keep connectors aligned as you disconnect them, and stop if a cable or connector appears damaged.
Are used or aftermarket e-bike controllers available in Edmonton, and what compatibility risks should I check?
Used and aftermarket units are options riders may consider, but a listing or visual match doesn’t establish compatibility. Compare the bike’s exact model and electrical setup with the controller’s voltage rating, connector shape and pin layout, display compatibility, cable routing and mounting points. A controller may fit physically yet remain electrically incompatible. Review its history and inspect the casing and connectors for visible damage before considering installation.
How can I identify a faulty Rad Power bike controller versus a battery, display, wiring, or motor problem?
A controller is only one possible cause of a problem. Loose connections, damaged cables or another electrical component can also affect how the bike behaves. Check connector condition, wiring and compatibility, and base replacement on evidence pointing to the controller rather than a hunch.
How long does a Rad Power controller replacement take, and are parts available locally in Edmonton?
One RadCity 5 Step-Thru owner reported that a future external-controller replacement was a 15-20 minute job. Sherwood E-Bikes offers e-bike parts and maintenance support in Edmonton.


